Table of Contents
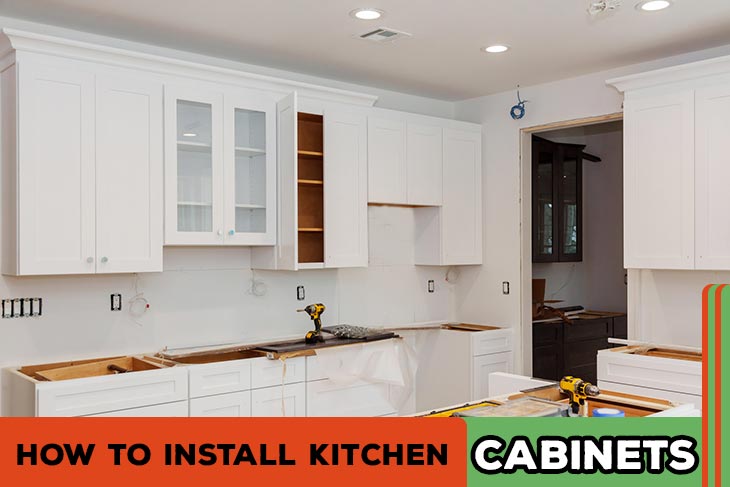
Do you want to install your kitchen cabinets? It does not seem very safe, but its technique is simple. You have to screw a series of different boxes on the wall in an appropriate sequence. Installation of kitchen cabinets requires you to manage various tasks from preparing space to adjusting doors of cabinets.
You can complete this task with some basic tools. Some standard tools are 4-ft level, a powerful screw gun to drive almost 2 ½ inches, and some screw clamps. Purchase a countersink bit/drill for pre-drilling the holes for screw. You will require one belt sander or block plane to fine-tune the cuts.
Moreover, you must arrange one 1-lb box of screws (2-1/2-inch) and three shims bundles. If you are a beginner to Install Kitchen Cabinets, you will need professional assistance. Here are some essential steps to follow to complete the installation process.
How to Paint Kitchen Cabinets Without Sanding? 7 Important Tips
Mark and Measure the Wall
In the first step, measure the height of base cabinets. Several standard cabinets are almost 34 1/2” high and 1-1/2” for standard countertop along with 18” backsplash. Some designers prefer a 20-inch backsplash to put small appliances.
If your backsplash is 18”, the actual measurements must be 54 inches from your floor to the base of upper cabinets. An uneven floor may impact measurements; therefore, you can measure from the top point along the wall. At a 15-inch point, you will draw one horizontal line on the wall. It will guide you through hanging the cabinets.
Make sure to use a level to ensure that this line is truly horizontal. You can locate all wall studs with the help of a stud finder. The wall stud plays an important role to provide the necessary support. It is essential to pay attention to the plumbing and electrical wiring.
Increase Security of Ledger Board
For support, you have to secure a suitable ledger board to the wall. You have to screw it into marked studs for temporary support during installation. Make sure to remove hardware and doors of cabinets to make them easy to install and light.
Hang Cabinets to the Wall
You have to attach different cabinets together, but keep an eye on their weight. It must be safe to lift for installation on the ledger board. Use clamps to fix stiles of cabinets together and check for plumb. Make sure to flush the fronts of cabinets.
Secure and predrill the cabinets together at stile using the screws. Affix a screw on the bottom and top in the back and front at the conjunction of two cabinets. Lift these cabinets on the ledger board and evaluate for level and plumb. You can shim all the cabinets as per need.
After shimmed for level and plumb, secure your cabinets at the studs into the wall. Make sure to affix and predrill the screws via thick framing pieces along with the cabinets. You can check for level and plumb to secure the cabinets. Replicate the process for the remaining cabinets.
If there is a gap between the cabinet and wall, use one filler bar to enclose a gap. Before securing your cabinet, you have to measure, mark, secure and cut the side pieces of the final cabinet. Once you are done with everything, you have to attach the hardware and doors. Remove a ledger board after finishing the installation of the wall cabinets.
Prepare Space to Install Kitchen Cabinets
Before installing kitchen cabinets, you have to use a 4-foot level, a 2×4 straight, and a square framing. Carefully check the corners and walls of the kitchen to ensure they are straight, square, and plumb. It is essential to note bubbles, angles, or dips that may need scribe-fitting, alterations of the wall, and shimming.
Install special electrical lines for garbage disposal, dishwasher, vent hood, and refrigerator before putting in cabinets. You have to locate receptacles on the countertop backsplash and other places where you want a portable appliance.
Rough-in wall-mounted switches and cabin lights along with drain and supply lines. The cap may not be glutted to a drainpipe.
Mark Important Reference Lines and High Points
If you want to mark an important reference line on the wall almost 48-inch off the ground, you will need a level. Snap one chalk line at all marks and measure from this line downward to the floor in different places. You have to mark the line at the point of short measurement and mark the height of base cabinets, almost 34 inches above the ground.
From this mark, extend a layout line laterally to the walls. The upper part of the base cabins will be flush with the line. Measure almost 17 – 18 inches above from the layout of the base cabinet and snap one chalk line from the base edge of the top cabinets.
Locate the studs to mark their actual locations on layout lines. Drill one small hole at every mark to confirm the location of the stud. Make sure to mark out the points for every appliance.

Base Cabinets Installation
If your floor is not even, search the high point on a floor along with the wall. Make sure to consider the point of installation. It will be great to start the installation of the base cabinet near the high point. You may find it easy to shim under cabinets on low spots to manage their level instead of starting your work from the low point.
Measure the cabinets and mark each level with a pencil on the wall. Start marking from the high point of the floor to the height of the cabinet. It is essential to use a level to assure a horizontal line. You can use it as a guide for installation.
Stud finders will help you to locate the studs and mark them along with the line around your kitchen. Initially dry fit a cabinet and check its level through the top. If required, you can shim until level.
It is the right time to predrill through the upper framing pieces in the wall studs and secure these cabinets in place with screws. Carefully recheck the level after securing each cabinet. Replicate the procedure until the installation of base cabinets. Attach the hardware and doors after putting cabinets to their place.
Install Toekick and Doors
- Replace the doors of cabinets after installation. For intersection doors that cover the frame of the cabinet, adjust the hinges to keep the door hang straight. For enclosure doors, fix hinges to flush the door with its face frame. You can see an even gap (reveal) around the perimeter.
- Use 1-inch brads and fasten the trim of toekick to the foundation cabinets. It will be great to start fitting with the long pieces and install and cut the short pieces. Close gaps between the trim and floor by scribing and cover them by brad-nailing one shoe casting to the ground.
- Respite the heads of the nail with one nail set and carefully cover them with the color-matched or wood putty wax stick. Suppose there is a crown molding to trim out upper cabinets, miter all the joints at the outside corners. Carefully cope with the junctions at the inner intersections.
- You have to align the bottom edge of molding with 1 – 2 inches finish nails. Glue the end joints of molding.
- Recess all the nailheads with one nail set and cover them with color-matched or wood putty wax stick.
Final Verdict
The above guide to Install Kitchen Cabinets will help you to prepare your space and install cabinets with perfection. If you are new to this job, you are advised to get professional assistance. Make sure to arrange all the critical tools and call someone for your help.
Carefully carry out a test-fitting for your base cabinets with dry-fitting technique. It will help you to find out if you need filler strips. You have to leave sufficient space for these strips. If you have any confusion, ask professional cabinet installers for your assistance.

