Table of Contents
Pressure canning is a practical and efficient method of preserving food that has been used by homemakers for generations. This technique allows you to safely store low-acid foods like vegetables, meats, and soups for extended periods without the need for refrigeration.
A pressure cooker is an essential tool for this process, using heat and pressure to create a sealed environment that kills harmful bacteria and creates an airtight seal. In this guide, you will get what is a pressure canner, the steps of how to use pressure cooker for canning, ensuring that your preserved foods are safe, healthy, and delicious.
Key points:
- Make sure your pressure cooker is suitable for canning before use.
- Use only recommended canning recipes and follow them carefully.
- Always use new canning lids for a proper seal.
- Allow the pressure cooker to vent before sealing it to create the correct pressure.
- Keep an eye on the pressure gauge and adjust the heat accordingly.
- Use caution when handling the hot jars.
- Clean and store the pressure cooker properly after use for long-term durability.
What is a pressure canner?
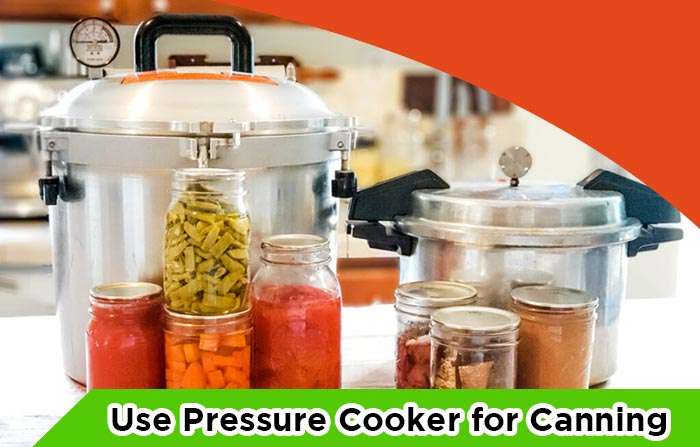
A pressure canner is a specifically designed kitchen appliance used for canning low-acid foods. Unlike a regular pressure cooker used for cooking, a canner has the capability of reaching higher temperatures and pressures, necessary for preserving foods like vegetables, meats, and soups.
It works by creating a sealed environment that prevents oxygen from entering and allows the temperature to rise above the boiling point of water, effectively killing harmful bacteria and creating an airtight seal. This seal ensures that the food inside remains safe for consumption for an extended period without the need for refrigeration.
How to use the pressure canner
Here you will get the procedures of using a pressure canner.
1. Choose the right pressure cooker: Make sure that the pressure cooker you are using is specifically designed for canning. It should be made of heavy-duty materials and have a tight-fitting lid to create a strong seal.
2. Read the instructions: Before using your pressure cooker for canning, read the manufacturer’s instructions carefully. This will help you understand the correct process and prevent any accidents.
3. Gather all necessary equipment: Apart from the pressure cooker, you will need a canning rack, canning jars, lids, bands, a canning funnel, tongs, and a ladle. Make sure all your equipment is clean and in good condition.
4. Prepare your recipe: Choose a canning recipe that has been tested and proven to be safe for pressure canning. Follow the instructions carefully and prepare all the ingredients before you start canning.
Next, you will see how to use pressure cooker for canning.

How to use pressure cooker for canning?
Looking to canning your food at home? You will learn how to use a pressure cooker for canning effectively.
1. Heat the Jars
Before beginning the canning process, it is essential to sterilize your jars and lids properly. This can be done by washing them in hot soapy water or running them through a dishwasher cycle. Once cleaned, the jars can be heated in a pot of water on the stove or in the canner itself.
2. Fit the hot jars
Once sterilized, remove the jars from the hot water and fill them with your desired food products, leaving about 1 inch of headspace at the top. Make sure to clean the rim of the jar with a clean, damp cloth to ensure a proper seal. Next, fit the filled jars into the canner, making sure they are not touching each other or the sides of the canner. The jars can also be placed on a rack inside the canner to prevent them from coming into direct contact with the heat source.
3. Remove Air bubbles
After all the jars are placed in the canner, carefully remove any air bubbles by running a non-metallic spatula or tool along the inside of the jar. This step is vital in ensuring a proper seal and preventing contamination. Once all air bubbles are removed, wipe the rims of the jars once more with a clean, damp cloth.
4. Wipe jar rim and add lids
Before sealing the canner, make sure to wipe the jar rims again with a clean, damp cloth to remove any food residue or debris. Add the lids and secure them with the appropriate canning rings or bands. Do not tighten the bands too much as this can prevent the air bubbles from escaping during the canning process.
5. Fill the canner and lock the lid
Fill the canner with the recommended amount of water according to the manufacturer’s instructions. Place the lid on the canner and lock it, following the manufacturer’s guidelines for your specific pressure cooker.
6. Vent pressure canner for 10 minutes
Before bringing the pressure up to the recommended level, allow the canner to vent for about 10 minutes. This process helps remove any excess air from the canner, creating a more stable pressure environment for canning.
7. Achieve correct pressure
After venting, turn the heat up and allow the canner to reach the recommended pressure level for canning. This process will take some time, depending on your pressure cooker and the altitude of your location. Once the desired pressure is reached, reduce the heat to maintain a steady pressure level.
8. Turn off the heat and depressurize
Once the recommended processing time for your canned food is complete, turn off the heat and allow the canner to depressurize naturally. Do not attempt to release the pressure manually as this can result in dangerous accidents.
9. Open the canner and remove jars
Once the pressure has dropped to zero, carefully open the canner and remove the jars using a jar lifter or tongs. Place them on a cooling rack or towel and allow them to cool for 12-24 hours. Once cool, label the jars with the contents and date and store them in a cool, dry place for future consumption.
What is the difference between a pressure cooker and a canning pressure cooker?
- A pressure cooker is used for cooking food, while a canner is specifically designed for canning low-acid foods.
- A canner can reach higher temperatures and pressures than a regular pressure cooker, ensuring the safe preservation of food.
- A pressure cooker can be used on any stovetop, while a canner may require a specific heat source, such as a gas burner.
- Pressure cookers come in various sizes, while canners are larger and can hold multiple jars for canning at once.
- Canning requires a longer processing time than cooking, and a canner is specifically designed to handle this prolonged period.
Conclusion
Using a pressure cooker for canning can seem challenging at first, but by following these simple steps, you can safely preserve your food at home. Make sure to always follow the manufacturer’s instructions and guidelines, and use caution when handling hot jars and canners. With this easy guide, you can confidently take on the process of pressure canning and enjoy delicious, homemade food throughout the year.
20 Tips to Maintain a Clean and Tidy Kitchen

